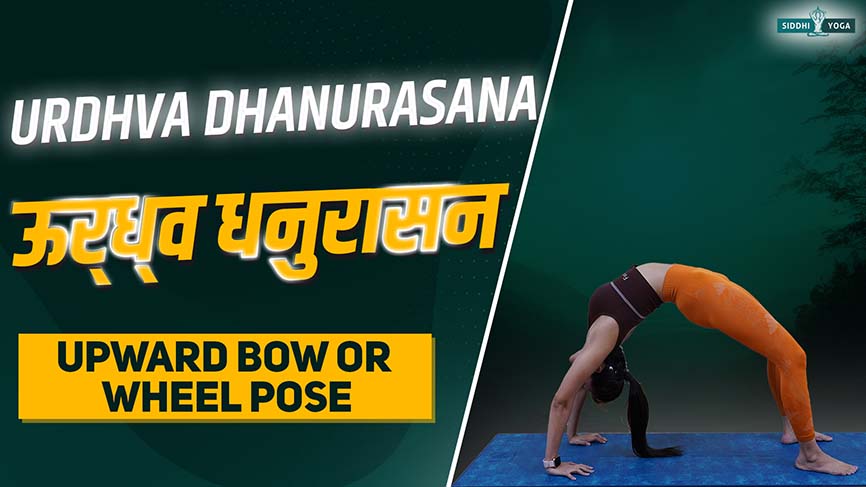
Dhanur: Bow
Asana: Pose
Urdhva Dhanurasana at a Glance
Urdhava Dhanurasana also known as Chakrasana, with many other title names for this challenging and advanced pose. This pose bends your spine backward also known as, the upward bow pose. The journey to get a perfect bow pose is not that easy, as it needs continuous training gradually and the result is not a final achievement. This challenge enhances focus and concentration and teaches you to be patient to attain something big in life.
Benefits:
- It helps to stretch the hip flexors and quadriceps.
- The pose stimulates both mind and body.
- Urdhava Dhanurasana stretches the organs in the belly, stimulating circulation.
- It opens up your chest and your lungs are stretched which increases your breathing capacity.
- Builds confidence and opens the heart chakra.
- It helps to improve posture and counteracts the effects of prolonged sitting.
Who can do it?
People with a good level of yoga practice can do this asana. Intermediate and advanced-level practitioners can do this asana. People with good flexibility and having patience and dedication to achieve something can do this asana because this needs to be progressed gradually. Dancers can do this asana. Individuals in sports can do this asana.
Who should not do it?
Beginners should avoid doing this asana. Individuals with any spinal injury should avoid doing this asana. Pregnant women should not do it. People with any issues with their ankles, knees, wrists, or hips should avoid doing this asana. People with high Blood pressure should avoid doing this asana. People with insufficient core strength should avoid doing this asana.
How to Do Urdhva Dhanurasana?
Find the Step-by-Step Procedure
This asana is challenging and cannot be done by everyone so if you have all the prerequisites of the physical body to do it, then initially do it under the guidance of your yoga teachers.
- Before you start this pose, you have to prepare yourself physically and mentally to start with, so do the preparatory poses like the sun salutations, Cobra pose, Bridge pose, Camel pose, and Halasana to get your body, to prepare itself for the back bend.
- These steps are for beginners or intermediate learners, and the starting steps for advanced practitioners are different.
- Lie down on the Mat or any soft carpet, with your legs straightened and back touching the mat and arms beside your body.
- Take some deep breaths relax and prepare yourself mentally to start with, inhale deeply exhale slowly, and release the tension.
- keep your knees bent glide your feet flat toward your buttocks and place them firmly grounded and stable.
- Inhale and lift your hands and place your palms near the ears, under the shoulders, and your fingers should point toward the shoulders. Your elbows should be shoulder-width apart.
- Now keep a check over the alignment till here and prepare yourself for the further process mentally.
- Now inhale and start pressing your palms against the mat and feet against the mat, and you need to engage your core, and you need to squeeze the gluteus and quadriceps to lift your hips, and lower back off the mat.
- Your upper back, shoulders, and head are still on the mat and now breathe here.
- Now inhale deeply, press your palms against the mat, and slowly bring the crown of the head to the mat and ensure that your elbows, don’t come outward on either side.
- Now exhale out and when you inhale next, press your palms to lift your shoulders, upper back, and head off the mat, and now your forearms be straight.
- Here you need to arch your back and bring the weight on the palms and soles of the feet and remember to keep your feet firm.
- Now this position your entire body is up, other than your palm and soles of your feet (arms and legs) and it forms an arch. Expand your chest and keep your core muscles engaged.
- be careful about your ankles and wrists and remember you need to make it strong and then perform this asana.
- This is the final posture (peak pose) where you are only rooted with your palms and feet and the rest of the body is balanced with the help of your feet and palms and is in the air. This final position is a graceful pose.
- Here the neck falls between the shoulders and the neck and head in one line, and don’t strain your head or neck too much yes this would come with practice and the crown of your head will be in connection with the earth.
- Your breath should be normal and gentle with ease and hold it as per your limit and don’t overdo it.
- When you feel to release, inhale and exhale and loosen your upper back, neck, and shoulders, but first bring your head to the mat slowly and gently.
- Then bend your knees slowly and elbows so that you can bring your shoulders to the mat.
- Now get your spine to the mat very gently and then your hips with ease and keep breathing and control it as it makes be fast at this point and get it normal.
- Let your knees be bent and do the pelvic tilt and then come to eh shavasana pose to rest and and cool and enjoy the effects of the pose.
The Advanced Practitioners Should Also Be Doing Warm-Ups and Stretches to the Major Muscles and Joints
- Drop back from a standing position into the Wheel.
- This starts from the Tadasana pose, feet should be slightly more than the hip width, and your feet rooted to eh ground.
- Now inhale raise your arms above, keeping it shoulder width apart, and get ready for this challenging back bend.
- Exhale and bring your pelvis in front, bend your knees, hips, and spine, and come into the back bending pose.
- Here your arms go back, your belly comes in front, and you will feel the weight of your body on your thighs and toes.
- Now slowly rest the palms on the floor and as soon as you bring the palms on the floor, straighten it immediately, or else your head can fall to the floor.
- So here be sure and aware of how and what you are doing and breathe normally into the pose.
- When you want to release. Now stretch the legs and arms and release and come back to the Tadasana pose and relax, and then in the Shavasana pose.
What are the Benefits of Urdhva Dhanurasana?
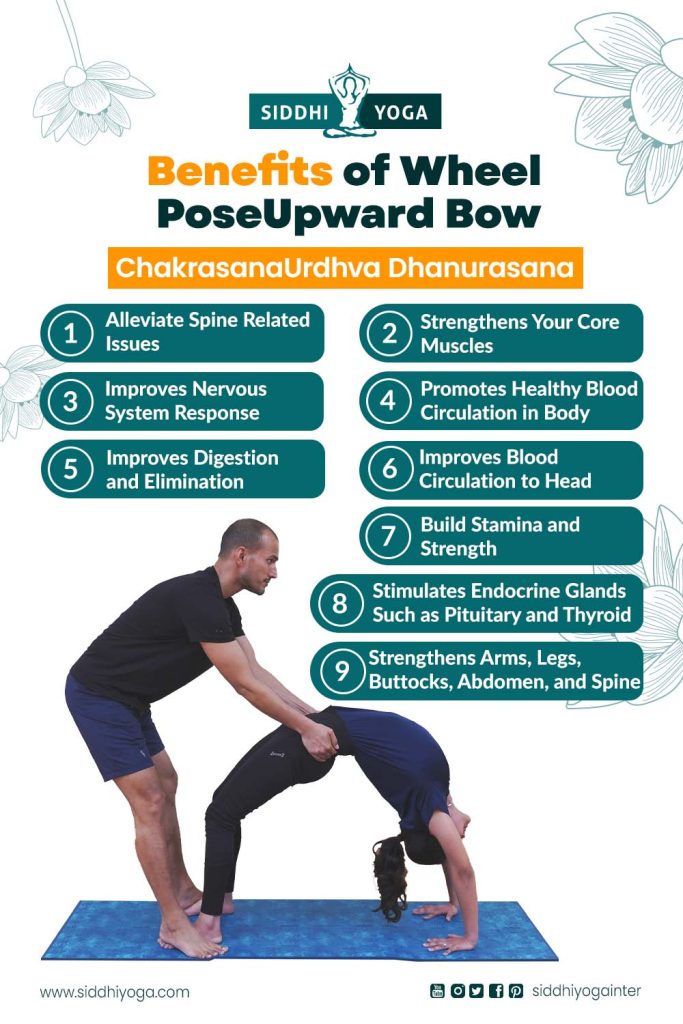
- It helps to strengthen your arms, legs, and spine.
- This asana uses, the quadriceps, iliopsoas, and abdominal muscles to get into the pose, so helps to stretch it.
- It helps to reduce belly fat and the excess fat around your hips and thigh area.
- It helps to expand the chest region, which helps the lung capacity and improves the quality of breathing.
- It massages the kidneys and activates the adrenal glands, which helps to keep us more energized and alive.
- It helps to strengthen your entire back and activates the muscles.
- It helps to strengthen your wrists and ankles.
- It helps to relieve negative emotions and keeps you away from depression.
- It helps to enhance the energy level and gives you mental clarity.
- This helps to improve your balance stability and increases your level of focus and concentration.
- This also requires a lot of patience and helps to be patient in your life.
Health Conditions that Might Benefit from Urdhva Dhanurasana
- Regular practice of the Urdhva Dhanurasana (wheel pose) pose may help strengthen and lengthen the spine and can help to improve spinal flexibility and remove the stiffness of the spine.
- This pose helps to stimulate the nervous system, which can help to relieve stress and anxiety.
- You can also get a mild stretch in your intercostal muscles.
- This pose can be beneficial for people who want to build their upper body strength.
- Regular practice under the guidance of the yoga teacher can help to correct the posture and enhance it.
Safety and Precautions
- If you have any chronic injury, with your knees, wrists, shoulders, neck, or back, should avoid doing this yoga asana.
- You should avoid doing this pose before your body is not flexible enough to take this pose and progress slowly.
- People who have any back pain should avoid this pose and do other safer modifications.
- If you have any wrist injury, just avoid or this would worsen the condition.
- Proper warmup and preparatory yoga poses are important to perform to loosen up your muscles before you do this asana.
- After performing the Wheel Pose, it is common to do a mild twist or forward bend.
- It is always better to do with proper alignment for your safety.
Common Mistakes
- Avoid doing this asana after meals, do it only on an empty stomach.
- Improper hand placement can be risky, as this may lead to injury to your wrist or any sprain.
- Avoid your elbows flaring outward.
- Don’t try to lift your hips too high.
- Your shoulders should be strong and stable to do the wheel pose.
- Attempting without any guidance can lead to injury.
- Not engaging your core cannot lead to the pose successfully.
Tips for Urdhva Dhanurasana
- Warm-up and preparatory poses are a must before doing this pose.
- You should have a strong core strength to support this the Upward-facing bow pose (wheel pose).
- Your hands should be on the side of your head and your fingertips pointing, to your shoulders.
- Your buttock muscles should be activated to lift your hips and pelvis.
- Breathing is the life of this pose, so coordinate your breath accordingly.
- Use props, initially but under the guidance of your yoga teacher.
- Listen to your body and act accordingly.
- Do a counter pose or resting pose to relax your muscles, like a child’s pose or Shavasana pose.
Physical Alignment Principles for Urdhva Dhanurasana
- Press your feet to the ground firmly and keep grounded.
- Press the palms to the ground and have a firm grip.
- Fingers pointing your shoulders.
- Knees hips-width apart.
- Keep the elbows in line with the shoulders.
- Roll your inner thighs down and press your hips upward.
- your torso is arched higher, taking the front of the body into a deeper stretch.
- Correct actions include internal rotation of the thighs, and upper arms, and the engagement of the hamstrings.
- Draw the shoulder blades toward the midline to engage the rhomboids.
- Lengthen through your lower back.
- The crown of your head should face the ground.
- Gaze between the hands.
- Keep your feet, hip-width apart.
- Shins should be perpendicular to the floor.
- Engage your core muscles.
- Toes should point forward.
- Expand your chest and straighten your arms as much as you can.
Urdhva Dhanurasana and Breath
Breath is the life of this pose and without coordinating your breath properly you cannot achieve this pose. Start with a deep and gentle breath as you start getting into the pose, inhale, and exhale when you start to lift your body off the floor. Keep your breath engaged with your core. Keep breathing while you are in this pose as long as you can and don’t force yourself. Breath will energize and increase your willpower boost your confidence level and reduce your stress and anxiety levels. Breathing will help to maintain the balance and stability of this pose.
Urdhva Dhanurasana and Variations
- While you are in this pose, you can lift one leg toward the ceiling.
- Walk your feet towards your hands.
- You can do a wheel pose on a ball.
- Two-legged inverted staff pose.
- Wheel pose by standing in the Tadasana pose.
- Wheel pose variation on the wheel.
The Bottom Line
Urdhva Dhanurasana is a challenging pose that requires a lot of patience and self-confidence, with a lot of focus and concentration. It can help you to, break the fears and challenges coming in your life and have patience to deal with. As every challenge needs to be dealt with care and progress gradually.
You will have better physical strength, especially the spine, wrists, legs, and arms, and also your mental strength. It can help eliminate asthma, back problems, and infertility with regular practice. Practice on an empty stomach. For any health concerns consult your doctor. The breath will be your guide and keep it flowing with the movement. Preparatory and cooling down asanas are a must.
Yoga is not just a practice; it’s a way of life. Take the first step towards a meaningful career by enrolling in our comprehensive online yoga teacher training courses. Choose from 200 hour yoga teacher training india, or 500-Hrs Yoga Teacher Training Programs – all crafted to help you master the art of teaching yoga. Embrace your passion, become a certified yoga instructor, and empower others to find their inner peace and strength.