
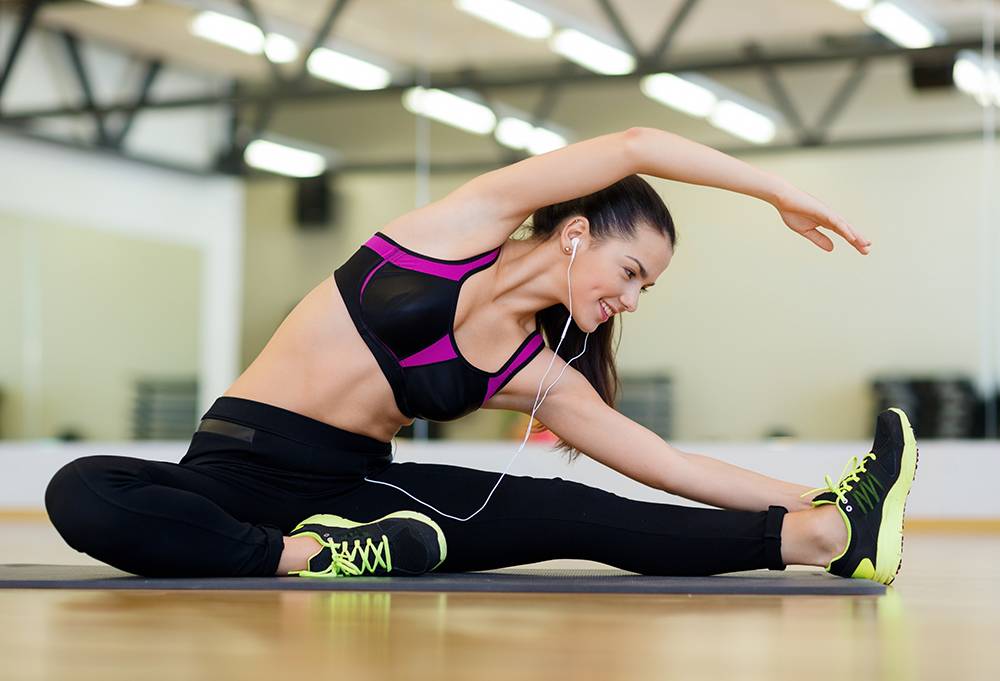
There’s one thing that every yoga teacher hears time and time again from new students interested in the practice. “I can’t do yoga because I’m not very flexible.”
Fortunately, flexibility is only a small part of what Yoga is all about. Really, it’s more about having a flexible mind than anything else. However, the posture exercises associated with Hatha Yoga are indeed a highly effective way to increase your range of motion and improve your ability to move with strength and control through that increased range of motion.
So if you can’t do yoga because you’re not flexible, then we have the solution…drum roll, please…Yoga!
In this article, we will begin by covering a number of concepts and frequently asked questions associated with developing mobility and flexibility through Yoga. Then we will outline several poses that target different parts of the body and will help to build your mobility in different ways.
First, we will address the most important question concerning flexibility. Namely, what’s so great about it?
Why is flexibility important?
All of the lithe and lovely yogi’s that grace our social media feeds sure make flexibility look good, but at the end of the day, there are important reasons to increase our range of motion regardless of how likely we are to ever be able to do the splits while standing on our head.
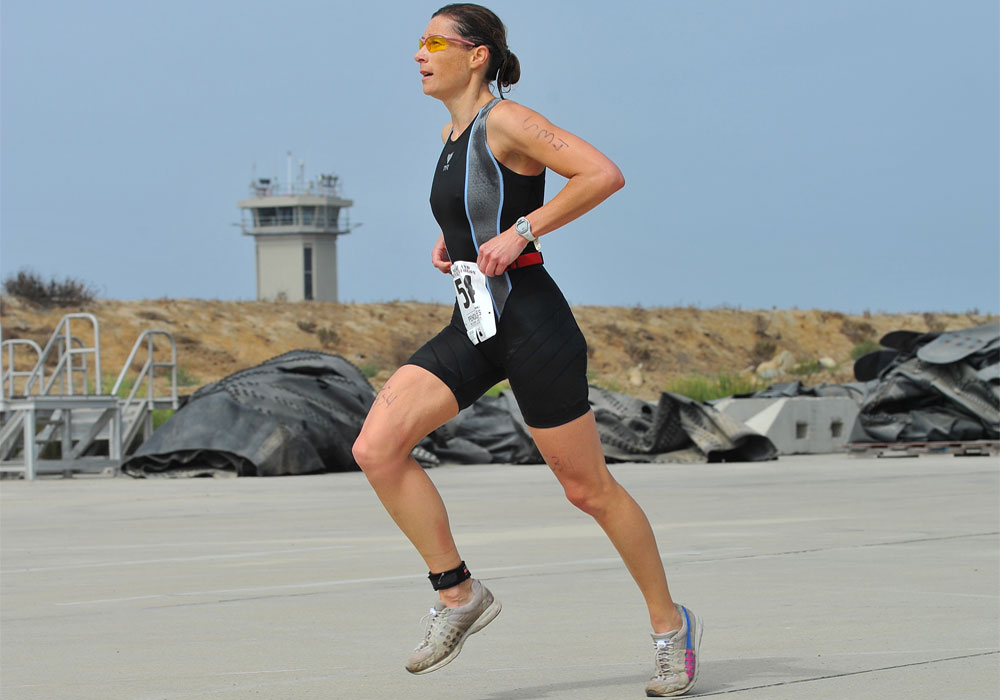
One of the most important markers of a person’s quality of life, particularly as they age, is their mobility.
The reason why we use the word mobility instead of flexibility here is that mobility means more than just how wide our range of motion is. It also means how effectively we can use our range of motion; how strong we are throughout that range of motion and how aware we are of our body and our position in space as we move through that range of motion.
Becoming more flexible helps to take pressure off of our joints, it increases blood flow throughout the body which helps to deliver resources to our cells and remove waste from the body, and most importantly it will indirectly improve our mood and energy levels by helping us to move through the world with efficiency and grace.
These benefits are accessible to everyone, not just the bizarrely flexible.
How do I get more flexible?
There are 5 distinct ways that we can increase our range of motion. Their relative importance may surprise you. Let’s start with the least important.
1. Lengthening our muscles
Though it may seem obvious that flexibility is directly related to how long a muscle can be stretched it’s a lot more complicated than that. When we stretch, we do lengthen the muscle. However, a muscle’s actual length is not generally the main factor that restricts our mobility.
Over a long period of consistent practice, a muscle’s length can increase slightly, but there are far more important factors to consider.
2. Understanding how our body moves
For a lot of people, the range of motion can increase dramatically after starting a yoga practice simply because the practitioner learns how to move effectively.
For example, in a Seated Forward Bend, pointing the feet and flexing the toes back towards the body will automatically create more space in the back of the leg. Bending the knees even slightly will create more space in the back of the leg. Increasing the length of the hamstrings by tipping the sitting bones away from the knees will allow you to come deeper into a forward bend without rounding the back.
In this way it is possible to increase your functional range of motion drastically without actually increasing the muscles ability to lengthen at all.
3. Building strength
It may seem counter-intuitive that building strength can help build flexibility. However, for people who aren’t already naturally flexible it may be the most important factor.
Most of the muscles in the body can be broken down into groups that include opposing forces. When one muscle in the group contracts, the other releases, and vice versa.
For example, when we engage our quadriceps, the big muscle on the front of the upper leg, our hamstring, the muscle on the back of the leg, releases. So, by strengthening the quadriceps we improve our ability to lengthen the hamstring, which means a deeper Forward Bend.
4. Training the nervous system
This is the single most important factor for increasing flexibility in people who already have active lifestyles. There are several reflexes in the body that automatically contract our muscles in order to protect our joints.
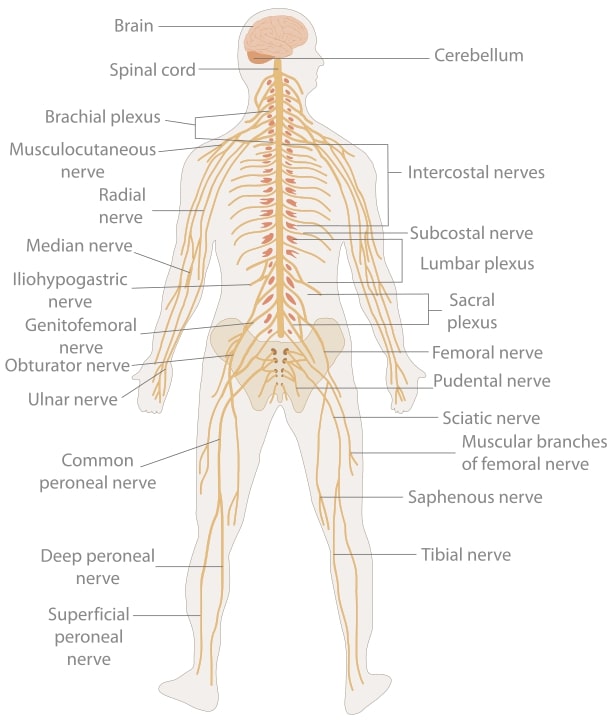
These reflexes are directly linked to the sympathetic nervous system, otherwise known as our “fight or flight mode.” Learning how to relax can help us gain conscious control of these reflexes and learning how not to trigger these reflexes can help us learn to relax more effectively.
Though the mental component of relaxation is important for controlling these reflexes, it is also equally important to develop strength, control and movement skills to avoid triggering them in the first place.
5. Breaking down fascia
Fascia is a layer of connective tissue that encapsulates our entire body. It encases all the muscles of our body and helps to link them together. Therefore, when we point or flex our toes it effects the range of motion in our upper leg. This is not because there’s a muscle that runs the whole length of our leg, it’s because of the bands of connective tissue that run the whole length of our leg.
If the fascia is not regularly stretched and conditioned it can develop adhesions that will restrict both a muscle’s ability to lengthen and it’s ability to grow. Fascia generally takes a longer time to respond to stimulation then a muscle does, this is part of why Yin Yoga has become so popular. Spending five or more minutes in a single pose will give the fascia time to break down and repattern itself.
How long will it take me to get more flexible?
This depends entirely on the person. If you are in relatively good fitness, you may find that your flexibility improves drastically simply by learning to move properly and relax the nervous system with controlled breathing and mental focus.
On the other hand, if you have lived a relatively sedentary lifestyle, you may find that your connective tissue is restricting your ability to stretch a muscle and these other factors have little effect. Breaking down connective tissue can be a long process. However, most people will still see improvement if they practice consistently for a few months.
It’s important to note that the more flexible you already are, the longer it will take to see an increase in your range of motion. It will also become increasingly important as you become more flexible to develop strength in opposing muscle groups so that you can enter your end range of motion with control so that you don’t develop tears or irritate your tendons and ligaments.
Yoga Poses For Flexibility: Legs
Malasana, Squat Pose
This is one of the most fundamental poses for opening up the hips. Try to remain in this pose for as long as possible and allow yourself to sink into it gradually.
Begin by standing with the feet slightly wider than hip-width apart and the toes slightly turned out. Slowly bend the knees and allow the hips to sink towards the floor. Ideally, you should be able to rest at the very bottom of this pose without much engagement. However, it may be beneficial to engage the front of the leg and hold yourself just above your limit before sinking lower.
Press the elbows against the inner thighs and draw the palms together in front of your heart. Resist the press of the elbows by pressing back against them with your thighs. Sit up as tall as you can.
Breathe deeply and remain in this pose for at least one minute and up to five.
Padangusthasana, Big Toe Pose
Begin by standing at the front of your mat with your feet hip-width apart. On an inhale lift the arms up overhead and, on your exhale, begin to fold forward, bending the knees as you draw the belly towards the thighs. Keep the chest open as you enter the fold.
If it is available you may take hold of the big toes with the index and middle fingers of each hand. You may also place the hands on the shins, the fingertips on the floor, or simply allow the body to hang. Try not to let the lower back round.
Remain in this pose for five to ten breaths. Rise back up on an inhale.
Prasarita Padotanasana, Wide-legged Standing Forward Bend Pose
Step the feet four or five foot-lengths apart from each other. Both the hips and the shoulders will be square towards the side of the room.
Place the hands on the hips. On an inhale, open through the chest and, on an exhale, begin to fold forward slowly. Keep the chest open and the spine long as you do so. Place the hands on the floor underneath your shoulders.
You can remain here with the spine parallel with the floor and the arms straight, or, if it is comfortable, you may continue folding forward so that the crown of the head is drawing towards the floor.
If you have folded all the way forward, take hold of the big toes with the index and middle fingers and pull very gently, just enough to engage the shoulders.
Remain in this pose for five to ten breaths. On an inhale, come to a halfway lifted position. Exhale there and then on the next inhale rise all the way back up to standing.
Ardha Bhekasana, Half Frog Pose
Begin lying down in a prone position with the front of the body on the floor. Place the left forearm on the floor in front of you parallel to the front of the mat. Lift the chest off the floor and stay engaged through the left shoulder.
Bend the right knee and reach back with the right hand, taking hold of the right ankle. Draw the right heel towards the right sitting bone. There should be a sensation of stretch through the front of the right leg. If you’d like to go deeper, press the hip into the floor and lift the right knee.
Hold this pose for ten to fifteen breaths and then release. Repeat the pose on the other side before moving on.
Baddha Konasana, Bound Angle Pose
Begin by sitting on the floor with the legs stretched out in front of you. Bend both knees and let them fall out to the side as you bring the soles of the feet together, forming a butterfly shape. Sit up tall, reaching the crown of the head towards the ceiling.
Most people will find this pose more comfortable if they bring the feet at least a foot away from the pubic bone, though flexible practitioners may draw the heels right into the pelvis, closing the knee joint completely.
Beginners should stay sitting up straight. Experienced practitioners may fold forward drawing the chest towards the floor.
If there is any pressure at all in the hips or knees, consider placing yoga blocks or pillows under the thighs to support your legs.
This pose has great benefits when held for long periods of time. Try to maintain the pose for at least a minute and up to five.
Supta Padangusthasana, Reclining Hand-to-big-toe Pose
This pose may be easier to perform with a yoga strap.
Begin lying down on your back. On an inhale lift the right leg and press the heel up towards the ceiling, straightening the leg. Bend the right knee and either wrap the yoga strap around the foot, taking hold of the strap with the right hand, or take hold of the big toe with your index and middle finger.
If you’ve used the strap, straighten the leg. If not, keep the knee bent. The head and shoulders should remain on the floor. Maintain the position for five breaths. On an inhale take the leg out to the right side.
Don’t take the leg so far over that the left sitting bone lifts off the floor, stay engaged through the core and hips to hold the leg in space. Hold here for another five breaths.
Lift the leg back up towards the ceiling on an inhale. Release the leg on an exhale and repeat the pose on the other side.
Yoga Poses For Flexibility: Back and Trunk
Ardha Matsyendrasana, Half Lord-of-the-fishes Pose
Start in a seated position with the legs out in front of the body. Cross the right leg across the left and place the bottom of the foot on the floor on the outside of the left thigh.
On an inhale reach the left hand up towards the ceiling and begin to twist to the right, making sure to keep the spine long, reaching the crown of the head towards the ceiling. Place the right hand on the floor behind you.
Hook the left arm across the right thigh and press the upper arm against the leg. Press the leg against the arm at the same time. The arm can be held at a 90-degree angle with the fingers pointing towards the ceiling.
To deepen the twist, lengthen the spine on your inhale and twist on the exhale.
Hold for at least ten breaths and up to three minutes.
Repeat on the other side.
Parivrtta Janu Sirsasana, Revolved Head-to-knee Pose
Sit on the floor with the legs stretched out in front of you. Take the legs apart so that they are on a 90-degree angle relative to one another. If you are unable to take them out this far, that’s OK, just bring them out as far as your ability to.
If your hips and hamstrings are tight it may be beneficial to sit up on a height; either a block or a folded blanket. It may also be beneficial to generously bend the knees, pressing the heels into the floor.
On an inhale, reach the right arm up towards the ceiling and begin to reach it towards the left foot on your exhale, stretching through the right side of the body. The left hand can take hold of the left foot, or press into the floor in front of you, whichever is more comfortable.
Don’t worry if you can’t reach your foot, the main purpose of the pose is to lengthen the side of the body. Keep the chest open towards the side and try not to let it fall towards the floor.
Hold for at least five breaths, come up on an inhale and repeat the pose on the other side.
Bhujangasana, Cobra Pose
Begin by lying down in a prone position with the front of the body on the floor. The legs can be hip-width apart, though more advanced practitioners may find more benefit in keeping the legs together.
Place the hands alongside the shoulders and press into the floor as you open the chest up towards the front of the room, entering a backbend. In Cobra Pose, unlike the similar Upward Facing Dog, the hips and legs remain in contact with the floor.
For most people, it is appropriate to keep the arms bent so that the lower back doesn’t overstretch. Focus on actively lengthening through the front of the body and keeping the buttocks engaged and the shoulders active.
More flexible practitioners can straighten the arms, though it’s very important that there’s no pinching or pressure in the lower back. Be mindful and take it slow.
Hold the pose for five to ten breaths. Lower back down on an exhalation.
Shalabhasana, Locust Pose
This pose is one of the best poses for building active flexibility, where a muscle is lengthened using the force generated mainly by their opposing muscle groups. Regular practice of this pose will help to build confidence and stability in back-bends and it is a prerequisite for the more advanced poses that focus on bending the spine.
Begin by lying down in the prone position with the front of the body on the floor. The legs can be hip-width apart, although more advanced students should make an effort to draw the legs together.
Reach the hands back so the fingertips are pointing towards the back of the room. Press the hips into the floor and lift the legs and the trunk off the floor at the same time, reaching towards opposite sides of the room.
Hold this pose for five to ten breaths. Lower down on an exhalation.
Setu Bandha Sarvangasana, Bridge Pose
Begin by lying down on the back. Bend the knees and draw the heels towards the sitting bones. The correct distance can be assessed by reaching with straight arms towards the feet. The fingers should just touch the heels.
On an inhale, press into the heels and lift the hips up towards the ceiling, lengthening through the chest as much as possible. Try not to let the knees fall out to the side. Keep the legs engaged.
The hands can either press into the floor, or if it feels comfortable, the hands can interlace behind the back as the elbows press into the floor.
Hold this pose for five to ten breaths. Lower back down on an exhalation.
Jathara Parivartanasana, Supine Twist
Lie down on the back. Reach the arms out wide with the shoulders connected to the floor.
Bend both legs, keeping the legs together. On an inhale, draw the knees towards the ceiling and lift the feet off the floor so that the shin is parallel with the floor. On an exhale let the knees fall out to the right side.
If both of the shoulders are still in contact with the floor, it may feel good to turn the head, taking the gaze over the left shoulder.
This a pose that has a more profound effect the longer you spend in it. Hold the pose for at least a minute and up to five. Draw the legs back up on an inhale and repeat the pose on the other side.
Yoga Poses For Flexibility: Arms
Because most yoga poses are meant to exercise the entire body there aren’t too many poses that are meant specifically for the arms. However, the following poses are particularly effective for opening and articulating the shoulders and arms. While practicing them, pay special attention to the way movements and adjustments in the lower body effect the alignment and engagement of the upper body.
Gomukhasana, Cow-face Pose
For beginners, this pose is best done sitting on a yoga block.
Sit on a block. Bend the right leg and draw the heel in towards the left sitting bone, with the knee facing forward. Cross the left leg over the right. Flexible practitioners will be able to draw the left heel towards the right buttock and bring the knees close together however this is not necessary. It may feel more comfortable to simply place the left shin across the right thigh and placing the foot on the floor.
On an inhale, lift the left hand towards the ceiling. Bend the arm so the left hand is reaching down the back. Reach the right arm behind the back and draw the shoulder back, pressing the back of the hand between the shoulder blades. You may wish to remain here, though more flexible practitioners will be able to clasp hands behind the back.
Sit up tall, opening through the chest. Breathe deeply in this pose for ten to fifteen breaths. Release the hands-on an exhale and unwind the legs. Repeat the pose on the other side.
Adho Mukha Svanasana, Downward Facing Dog
From a table-top position, press into the hands, lifting the knees off the floor and pressing the hips up towards the ceiling. Let the head fall between the arms. Bend the knees and tilt the pelvis so the tailbone is moving up towards the ceiling.
In Downward Facing Dog, it is important to keep the shoulder blades spread and the shoulders strongly engaged. Maintain a wide base of support with the hands slightly wider than the shoulders and externally rotate the shoulders by turning the eye of the elbow towards the front of the room. You may have to bring the chest away from the floor in order to accomplish this.
Press strongly into the hands and try to extend the arms. Make sure not to hyperextend the elbows. Keep a micro-bend in the arms.
Hold this pose for five to ten breaths.
Virabhadrasana I, Warrior One
From a standing position, step the left leg back and bend the right leg so that you enter a lunging position with the feet four or five-foot lengths apart. In Warrior One the back foot is on a 45-degree angle with the heel on the floor. The chest and shoulders are squared towards the front of the room.
On an inhale lift the arms over head. Beginners can simply lift the arms over head, keeping their hands shoulder-width apart. However, it is a better exercise for the shoulders to spread the shoulder blades so that the shoulders come forward relative to the spine.
The arms should be able to come closer together and the palms should meet with fingertips reaching towards the ceiling. Bring the gaze towards the thumbs.
Hold this pose for five to ten breaths. Step forward on an exhalation and repeat on the other side.
Virabhadrasana II, Warrior Two
From a standing position, step the left leg back and bend the right leg so that you enter a lunging position with the feet four or five-foot lengths apart. In Warrior Two the back foot is only slightly turned in, almost 90 degrees relative to the front foot.
The chest and shoulders are square towards the side and the arms are reaching out towards opposite sides of the room. The gaze comes to the middle finger of the front hand.
Reach strongly through the entire arm, keeping it exactly parallel with the floor. The shoulder blades can draw together, and the shoulders can lower slightly, without lowering the arms.
Hold this pose for five to ten breaths. Step forward on an exhalation and repeat the other side.
Since there are so many factors that affect our range of motion, it is very important to employ different strategies in order to address each of them.
Building active flexibility requires the strong engagement of muscles, but Yin Yoga aims for as little engagement as possible to break down fascia. Both approaches address important factors in developing a range of motion. Clearly, using a variety of methods is the wisest choice.
Our Online Yoga Teacher Training give you the widest possible overview of yoga techniques for developing strength and flexibility, not only of your body but also your mind and spirit.
Register today!

Responses